Needlework: |
|
Canvaswork - tent |
|
Pulled Thread (pdf) |
|
Goldwork Basics |
|
Surface Embroidery |
|
Smocking & Pleating (coming soon we hope) |
Clothing: |
Textiles & Thread: |
|
Lucet Basics - Square and Flat Braid |
|
Dyes: |
Cooking: |
Golden Poppy Competition & Entries: |
|
Tinctures: Dyes & Inks |
| Narrow Wares: Fingerloop Braiding (coming soon) |
 |
 |
 |
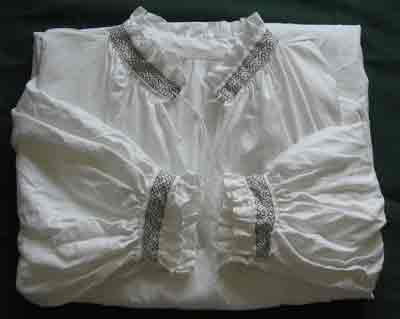
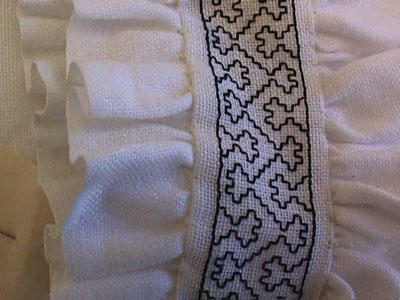
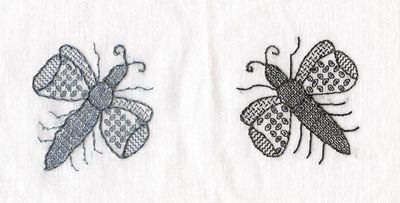
collar and cuffs for my husbands German shirt ----- dragonfly motif from my column in Needlepoint Now with the left side in modern metal threads and the right side in black silk with gold whipping
Blackwork: a bit about History and Styles
The origins of "blackwork" are unclear, but appear to be from the Middle East. Monocromatic geometric designs abound from the middle eastern worlds of the Sassinachs and the Moors. There is Egyptian double running embroidery from the 12th C and an explosion of patterns, that nearly mirror the Spanish and English blackwork, from the 13th-15th C. We see the rise of interest in what is traditionally called Blackwork, from the Tudor Period, in both England and Spain. The patterns are also seen in various colors in the 16th C. through out Europe; especially in Germany and Italy.
The patterns evolve and I would suggest that there are 3 basic styles of patterns up through the mid-17th C. -- bands, curvilinear, and pictorial.
Bands are exactly that - bands. As the model books of the 16th C spread, we also see more and more portraits with clothing where the collars and cuffs are done in blackwork bands. Done in both double running and backstitch, some of the patterns can be worked as reversible. We think of these as being counted although sometimes they were done by "eye", but look counted.
Curvilinear refers to the beautiful and intricate designs with curved tendrils around flowers, fruit, bugs, and beasties. The curves were done in a variety of stitches (stem, back, ceyon, plaited braid, etc.) and done in a variety of mediums from silk to metal thread. The inner workings were done in a variety of stitches, but primarily in double running, speckling, and back stitch. These inner workings were sometimes done in filling patterns or in a more pictorial mode. We have extent pillowcases, coifs, and clothing showing these.
Pictorial refers to the pieces which are primarily done as if drawing a picture. There are a number of chalice veils done in this manner. Some of the elements maybe banded or curilinear, such as with the Cherub Chalice Veil that incorporates the cherub drawings and a number of filling patterns.
For more on blackwork go to What is Blackwork by Linn R. Skinner also look for her how-to lessons
Projects
To understand the differences and to teach the basic blackwork stitches, patterns and techniques I worked up the following projects:
Blackwork Filling Patterns - Needlecase (a kit for the West Kingdom Needleworkers Guild and the Queen's Gift Chest 2002-7) - all period patterns
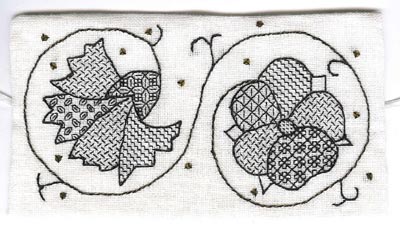 Done on 28 ct. linen, the design is drawn on and then filled. The instructions provide several different filling patterns that can be placed in any open section. While using multiple filling patterns in this manner is not in itself a period style, it does allow the student to experience different patterns. Historically all the petals would most likely be done in the same pattern while accenting items like leaves done in another pattern. In addition, historically the designs would be much smaller with 3 flowers filling the same space where there is one in this design. This version of the needlecase was then accented with gold thread and spangles. [This project is still available as a class.]
Blackwork Filling Pattern - Bookmark (taught at GWW '02) - a period filling pattern
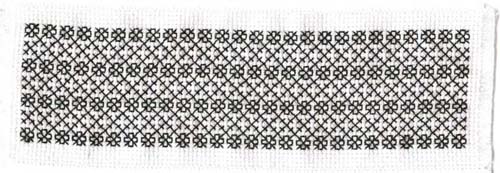 Done on an Aida 14 ct premade bookmark, this class works on how to breakdown a filling pattern into its components. This particular pattern has vertical, horizontal, and diagonal elements. It takes multiple runs to workup the pattern layer by layer.
[This project is still available as a class.]
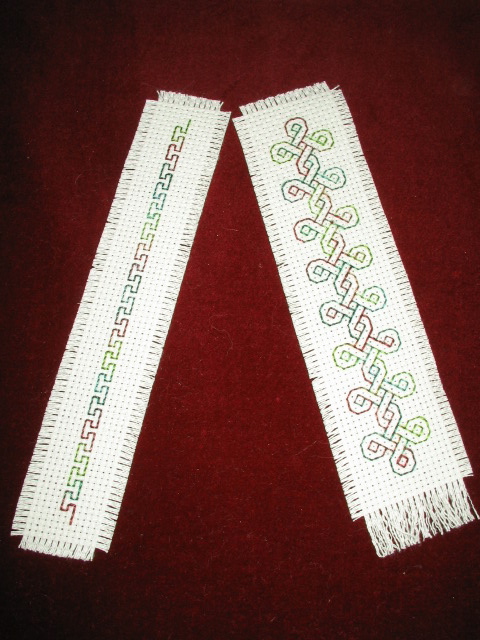
Blackwork Bookmark - test band pattern for Blackwork basics class - from Anonymous: A Woman and Her Work
 This band bookmark was taught as a beginning blackwork class (1999-2002). The simple design works well to learn doing outbound runs, starts and stops, double running, backstitch, speckling, and pattern reversal. Again a commercial 14 ct Aida bookmark was used so that the student could complete the project in a short time and feel the success of completion. Another thing that I feel is vitally important as a teacher, is that the beginning needlework student do a project that they can complete and use in a limited period of time. Then, over time they can reflect back on the project with pride and consider moving forward to a more challenging project.
Hints and Techniques for doing Blackwork Filling Patterns
Blackwork is about making lines that in turn form patterns. Therefore, the objective is to make the lines as clean as possible.
1. Keep your needle as perpendicular to the fabric as possible. Since your thread follows your needle, you want the thread as straight in the hole as you can get it.
2. Blackwork is not about pulling on the fabric or looping. Keep your tension even -- not too tight and not too loose.
3. Anchoring threads -- use an away or waste knot to start and leave enough to weave the end in after. When using a single thread you can usually whip the thread around prior stitches on the back side of the fabric. If the fabric is thin you will want to make your tails look like the line of stitching For instructions on this technique see Marion Scoular "Why Call It Blackwork".
4. When determining how to work the pattern, you need to break the pattern down into "runs". The objective is to do the pattern in the cleanest, neatest manner with the fewest overlap in threads or threads flowing on the backside where there is no thread on the front side. Such threads tend to show through the fabric and detract from the crispness of the pattern.
5. Plan on doing any side trips on the first or outward run.
6. Determine if the pattern is linear, repeating, or diagonal in nature. The patterns above have both linear and diagonal elements. This will help determine your runs. Remember there are many ways to work any pattern and no one right way.
7. Sharing holes - the debate is whether to use a blunt needle and not pierce the thread resulting in a slight offset of stitches or to pierce the thread and make the lines perfectly straight. Your choice.
8. When doing the filling stitches within a defined area, you will need to do compensating stitches to make the patterns fit.
Blackwork Booklist --
go to the Annotated Booklist on the West Kingdom Needleworkers Guild Website - nearly 300 books with comments on the content and usefulness of each. I have included many key books from my personal library on this list.
 If I had to list books, I would probably choose 3 to start with:
Why Call it Blackwork by Marion Scoular -- best hints on starting and stopping techniques (not historical blackwork)
Blackwork Step by Step by Carol Leather -- this book holds your hand while you learn (not historical blackwork)
100 Blackwork Patterns by Linn Skinner -- historical filling patterns - she also has kits with historical band patterns
Useful Websites with Actual Historical Designs:
Fill-In Patterns from 16th C. Blackwork Embroideries
Bronwen's Blackwork Library (16th C) - currently offline
Vinciolo's Patterns
Jane Seymour's Cuff
Elizabethan Practical Companion Blackwork Gallery
Useful Websites Period Style/Inspired Patterns:
Blackwork Embroidery Archives
Rainbow Gallery-Blackwork free patterns
Leon Conrad Designs
Dragon Bear Designs
Carol Leather's X-Calibre Designs
As a teacher I never discount how using new fun threads can blend with historical techniques and patterns. Before you know it you have some new converts to historical stitching.
Return to the Main Page for Bayrose.org
All Rights to Pictures and Text Reserved by Robin L. Berry, unless noted otherwise - 2007.